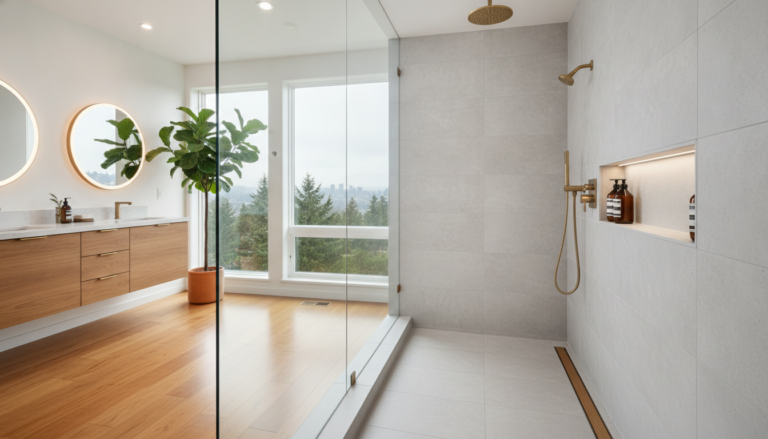
Living in the Pacific Northwest means embracing the beauty of lush evergreen forests and coastal rain. However, the constant dampness of the Washington climate presents a significant challenge for homeowners, particularly when it comes to indoor moisture control. Bathrooms, already the most humid spaces in any house, face double the burden in this environment.A standard cosmetic upgrade is simply not enough to withstand the relentless assault of steam, condensation, and ambient humidity. Instead, residents must prioritize a specialized approach. Undertaking a mold resistant bathroom remodel is the only definitive way to ensure your investment does not rot from the inside out within a few short years. By focusing on advanced building science rather than just beautiful fixtures, you can effectively seal out moisture and protect your family’s respiratory health. This comprehensive guide will walk you through the technical foundations necessary to achieve a completely watertight, breathable, and ultimately mold-proof sanctuary that thrives even through the wettest Seattle winters.
The PNW Homeowner’s Biggest Fear: Hidden Bathroom Mold
Every homeowner in the Pacific Northwest shares a common, silent dread: discovering black mold festering behind their beautiful shower walls. Because moisture in Washington rarely has a chance to evaporate naturally due to high ambient outdoor humidity, even minor trapped condensation can quickly escalate into a full-scale biological hazard. Unfortunately, traditional building practices often used porous greenboard and basic cement backer board without a true vapor barrier. Over time, steam penetrates the grout lines, soaks the substrate, and begins decaying the wood framing behind the tile. You might initially notice a persistent musty odor that no amount of bleach can eliminate, or perhaps a slight sponginess in the floor near the bathtub. By the time visible dark spotting appears on your drywall or ceiling, the structural damage behind the scenes is usually catastrophic. Avoiding this devastating scenario requires tearing out the old, compromised materials and starting fresh from the bare studs. To truly secure your home during a mold resistant bathroom remodel, you must shift your mindset from aesthetics to moisture defense, engineering a space that actively repels water at a molecular level.
How to Build a Mold-Resistant Bathroom: The Ultimate 3-Step Solution
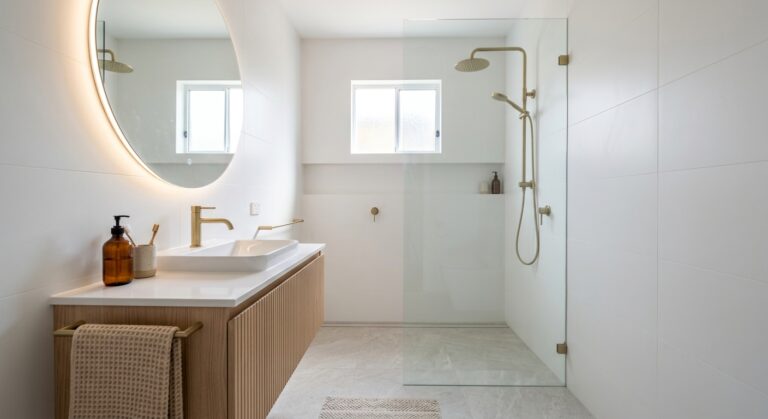
Achieving a permanent victory over mildew requires a strategic combination of modern materials and precise installation techniques. To create a mold-resistant bathroom in Washington, you must combine three essential elements: a structural waterproofing system (like Schluter-Kerdi), low-absorption epoxy grout, and a mechanical ventilation system properly sized for your square footage to maintain humidity below 50%. By adhering to this rigorous three-step protocol, you can construct an impervious barrier that keeps structural moisture levels effectively at zero.
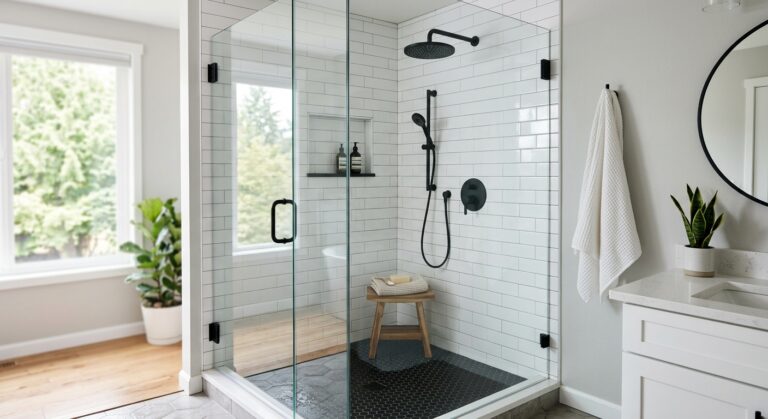
1. Install a Bulletproof Waterproofing System (Schluter-Kerdi)
The absolute foundation of a successful mold resistant bathroom remodel is establishing a continuous, impenetrable envelope around the wet zones. Forget the outdated methods of relying on the tile itself to stop water; tile and standard grout are not inherently waterproof. Instead, installing a modern sheet-applied membrane is the most critical step. Products like the Schluter-Kerdi system utilize a pliable, modified polyethylene waterproof membrane that is applied directly to the wall boards before any tile is laid, effectively waterproofing the substrate itself. Because the membrane is completely vapor-retardant, heavy steam cannot pass through it to reach the vulnerable wood framing behind the walls. When installed correctly with overlapping seams sealed using specialized waterproof banding, the entire shower enclosure becomes a watertight basin. Even if water manages to slip past the surface tile, it hits the membrane and is directed straight down into the integrated drain system. Furthermore, utilizing closed-cell waterproof backer boards entirely eliminates the organic paper-faced materials that mold spores need as a food source, cutting off the risk before it even begins.
2. Upgrade to Low-Absorption Epoxy Grout
Once the structural waterproofing is secured, the next layer of defense involves the surface joints. Standard cementitious grout is inherently porous—it acts like a microscopic sponge, eagerly absorbing shower water, soap scum, and body oils every time you bathe. This trapped organic matter becomes a prime breeding ground for surface mildew. To combat this effectively, upgrading to an advanced epoxy grout is non-negotiable for damp climates. Unlike traditional powder-and-water mixtures, epoxy grout is made from specialized resins and a filler powder, making it extremely durable, completely non-porous, and naturally stain-proof. Because it absorbs virtually zero moisture, mold simply cannot anchor its roots into the surface. While the material is more expensive and requires a highly skilled tile setter to install—as it cures rapidly and is notoriously difficult to clean off the tile if left too long—the long-term benefits are completely unmatched. You will never need to apply chemical penetrating sealers again, and your shower will maintain its pristine, newly-installed appearance with only minimal routine cleaning.
3. Optimize Mechanical Ventilation for Your Square Footage
Even with the best surface materials in the world, failing to extract airborne steam will eventually ruin your painted ceiling and upper walls. Mechanical ventilation is the unsung hero of indoor air quality and structural longevity. For a Washington home, you must precisely calculate your exhaust fan’s capacity based on the room’s total volume. The general industry rule dictates you need at least 1 CFM (Cubic Foot per Minute) of airflow for every square foot of floor space, but in a damp climate, oversizing your exhaust fan by 20% provides an optimal safety margin. A standard 50 CFM builder-grade fan will struggle to clear a steamy master bath. You must upgrade to a high-capacity, ultra-quiet unit and ensure the ductwork is rigid, insulated, and vents directly to the exterior of the roof—never into the attic. If moist air is dumped into a cold Pacific Northwest attic space, it will immediately condense and rot your roof trusses. Proper exterior extraction guarantees that the ambient humidity drops back to normal levels rapidly after every single shower.

Best Anti-Mold Materials and Finishes for Damp Climates
When selecting your finishes during a mold resistant bathroom remodel, minimizing seams and eliminating organic compounds should guide every purchasing decision. Using larger materials reduces the number of vulnerable joints where dirt and moisture can accumulate over time. Let’s compare standard building choices against the optimal, moisture-repelling selections for your renovation project:
| Material Category | Standard (High-Risk) Choice | Mold-Resistant Upgrade |
|---|---|---|
| Wall Board | Standard Drywall (Paper-faced) | Glass-Mat Gypsum or Foam Backer Board (e.g., Kerdi-Board) |
| Shower Flooring | Small Mosaic Tiles with Cement Grout | Solid Surface Acrylic Pan or Large Format Porcelain with Epoxy Grout |
| Paint | Standard Interior Latex Paint | High-Gloss or Semi-Gloss Antimicrobial Bathroom Paint |
| Baseboards | MDF (Medium Density Fiberboard) | PVC or Solid Hardwood treated with exterior-grade sealant |
By substituting vulnerable organic materials with their synthetic or non-porous counterparts, you drastically shrink the maintenance requirements of the room. Large format porcelain tiles, for example, look incredibly modern while cutting the total grout surface area by up to 80%. Similarly, removing MDF baseboards—which rapidly swell and disintegrate when exposed to pooling water—in favor of installing waterproof PVC trim ensures that accidental splashes near the bathtub will not lead to hidden decay along the floor line.

Pro Tips for Maintaining Under 50% Humidity Year-Round
Building the right infrastructure is only half the battle; the rest comes down to daily moisture management. The absolute key to long-term success in the damp Pacific Northwest is maintaining your bathroom’s relative humidity below 50% at all times. Here are the most effective strategies and daily habits to keep your space bone-dry:
- Install Humidity-Sensing Switches: Replace your manual fan switch with an automated sensor. The fan will turn on by itself when the humidity spikes and, more importantly, will continue running for 20 to 30 minutes after you leave the shower until the room is fully dry.
- Utilize Radiant Floor Heating: Heated floors are not just a luxury item for cold winter mornings. By warming the tile, radiant systems significantly accelerate the evaporation of residual water droplets on the floor, leaving mold with no standing water to consume.
- Keep the Air Flowing: Always leave the shower door slightly ajar after bathing, and try to keep the main bathroom door open when the space is not in use to encourage cross-ventilation with the rest of your climate-controlled home.
- Use a Squeegee: Taking 30 seconds to squeegee the glass enclosure and tiled walls drives the bulk of the water directly into the drain, dramatically reducing the amount of moisture the exhaust fan needs to process.
“The most beautiful tile work in the world is worthless if the air stands still. Treat your bathroom ventilation as a critical life-support system for your home’s structural framing. If the mirror is still foggy 15 minutes after a shower, your exhaust system is failing to do its job.”

Summary: Long-Lasting Protection for Your Washington Bathroom
Executing a mold resistant bathroom remodel in the famously wet climate of Washington State is a critical investment in both your property value and your family’s daily well-being. By confronting the threat of moisture head-on, you can permanently eliminate the exhausting cycle of scrubbing away toxic mildew and worrying about concealed rot behind your walls. Remember that ultimate success hinges on the synergy of the comprehensive 3-step solution: a flawless waterproofing membrane like Schluter-Kerdi, impenetrable epoxy grout lines, and a meticulously calculated mechanical exhaust system. Combined with smart daily habits, automated humidity sensors, and anti-microbial surface choices, your newly renovated space will remain pristine, structurally sound, and refreshingly dry. Don’t let the Pacific Northwest weather dictate the health of your home’s interior. Take a proactive, science-based approach to your renovation, and you will enjoy a beautiful, spa-like sanctuary that stands strong against the dampest conditions for decades to come.