")
The most effective strategy to maximize space in a tight bathroom involves a combination of light, continuous color palettes, installing a wall-mounted or floating vanity, replacing bulky curtains with a clear glass enclosure, using large-format tile, integrating smart vertical storage, and upgrading to a walk-in or corner shower. If you are exploring small bathroom remodel ideas, these fundamental adjustments will immediately transform a claustrophobic footprint into a bright, airy sanctuary.
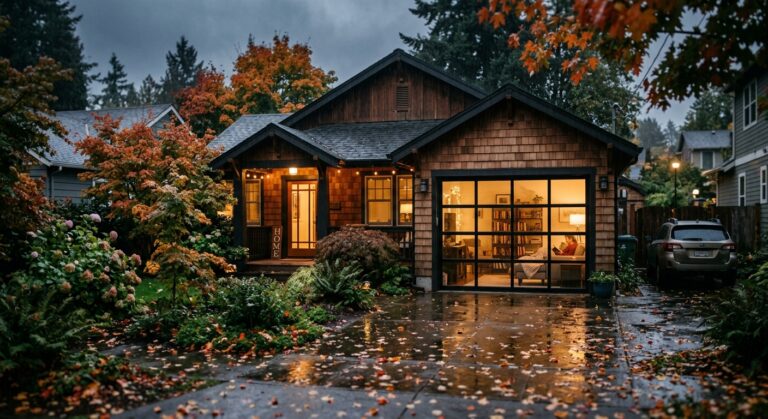
For homeowners living in Renton, Bellevue, Maple Valley, Tukwila, and the broader Eastside, dealing with cramped residential architecture is a common challenge. Homes built in these Seattle suburbs during the 1960s through the 1990s often feature boxed-in bathrooms with severely restrictive layouts that no longer serve modern lifestyles. By leaning into strategic design principles, you can visually push the walls back and reclaim valuable floor space. Whether you are looking for an aesthetic refresh or comprehensive bathroom remodeling in Renton, this practical guide will walk you through actionable techniques to elevate your property’s comfort and functionality.
Why 1960s–1990s Renton & Seattle Bathrooms Feel So Cramped
If you own a classic rambler, split-level, or mid-century home in the Greater Seattle area, you have likely noticed that the original builders did not prioritize spacious master baths or powder rooms. During the housing booms of the 1960s to 1990s, suburban developers focused heavily on maximizing the number of bedrooms and living areas, often sacrificing square footage in utility and hygiene spaces. Consequently, the standard room was tightly enclosed, compartmentalized, and filled with oversized, inefficient fixtures.
These older local builds commonly suffer from a triad of space-killing design choices: massive drop-in cast iron tubs that consume nearly half the floor plan, bulky floor-standing vanities that block visual flow, and tiny, poorly placed windows that fail to invite adequate natural daylight. The result is a room that feels much more like a dark utility closet than a relaxing retreat. Furthermore, traditional 1980s and 1990s designs often included dropped ceilings or soffits above showers, visually compressing the room’s height. To truly open up these older Pacific Northwest spaces, a successful compact bathroom upgrades strategy must involve dismantling these outdated architectural boundaries to let the room breathe.
")
7 Proven Small Bathroom Remodel Ideas to Expand Your Space
Upgrading a restricted layout requires moving beyond simple cosmetic fixes. You need structural and visual strategies that manipulate depth, light, and utility. By implementing the following seven design concepts, you can dramatically improve the daily usability of your space while adding lasting equity to your home. For a broader look at what’s popular locally, check out the Top Bathroom Remodeling Trends in Seattle for 2026.
1. Rethink the Layout: Walk-In and Curbless Showers
One of the absolute best ways to reclaim physical floor space is by abandoning the traditional bathtub-shower combo. In older homes, bulky tubs are notorious space hogs that present visual barricades in an already tiny room. By opting for a modern walk-in shower, you eliminate that visual wall, creating a seamless transition from the main floor into the wet zone.
Taking it a step further, a curbless shower design completely removes the step-over barrier. When the bathroom floor material extends directly into the shower pan without interruption, the eye perceives the entire room as one large, continuous plane. This minor layout tweak yields massive psychological benefits for spatial perception. If you rarely take baths, executing a professional Tub-to-Shower Conversion in Seattle is arguably the highest-ROI decision for an undersized bathroom.
2. Visually Expand with Light Palettes and Large-Format Tile
Color and texture play pivotal roles in how we interpret the dimensions of a room. Dark, heavy colors absorb light and pull walls inward, whereas crisp whites, soft warm grays, and pale earthy tones bounce light around, simulating openness. Maintaining a continuous, light-colored palette across your walls, floors, and ceiling prevents the space from feeling choppy.
Equally important is your choice of hardscaping. While mosaic tiles have vintage charm, their countless grout lines create busy, grid-like patterns that visually clutter the environment. Instead, install large-format tiles (such as 12×24 or 24×24 inches). Fewer grout lines mean fewer visual interruptions, which tricks the brain into perceiving a grander surface area. Matching the grout color closely to the tile color will further enhance this expansive, monolithic illusion.
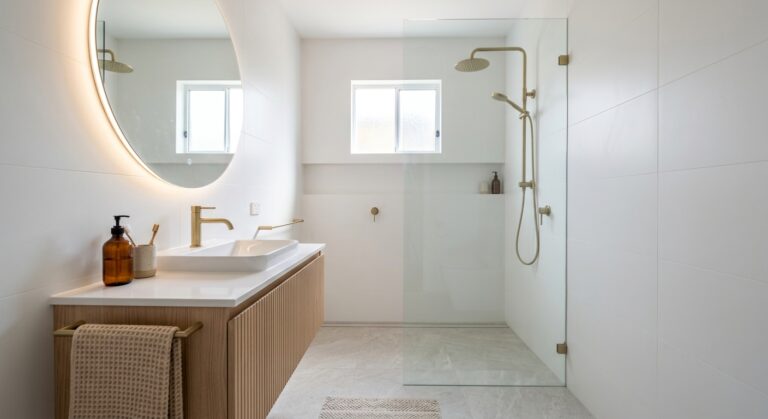
3. Free Up Floor Space Using Floating Vanities and Wall-Mounted Toilets
The more visible flooring you have, the larger the room will appear. Standard vanities and toilets anchor heavily to the floor, instantly subtracting square footage. A floating (wall-mounted) vanity leaves the floor beneath it exposed, allowing the eye to trace the flooring all the way to the baseboards. It provides necessary storage and counter space without the heavy, blocky footprint.
Similarly, wall-mounted toilets conceal the water tank inside the wall cavity, extending only the bowl into the room. This can save up to 10 inches of precious outward clearance—a massive difference when mapping out the layout of a compact space. These fixtures also have the added benefit of making floor cleaning incredibly quick and easy.
")
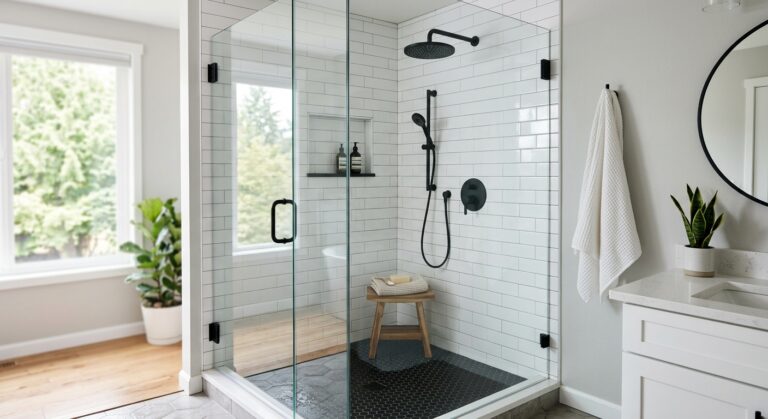
4. Swap Dark Curtains for Clear Glass Shower Enclosures
A shower curtain effectively cuts a small room perfectly in half, establishing a soft fabric wall that blocks light and line-of-sight. If you want the space to feel expansive, ditch the curtain rod entirely. Upgrading to a frameless, transparent glass shower enclosure is a transformative design move. By using clear glass, you allow natural and artificial light to penetrate the deepest corners of the wet area, significantly opening up the layout.
“In tight floor plans, visual continuity is your strongest asset. A frameless glass enclosure ensures the human eye can travel from the entryway directly to the back wall uninterrupted, instantly making a 5×8 space feel like a master bath.”
5. Optimize Vertical Storage, Recessed Niches, and Mirrored Cabinets
Storage is usually the first casualty in a reduced-footprint design. However, instead of expanding outward into the room, you must build into the walls. Recessed shower niches for shampoos and soaps eliminate the need for bulky hanging caddies or corner shelves. These niches can be tiled in an accent color or matched seamlessly to the surrounding walls.
For everyday toiletries, swap flat wall mirrors for recessed mirrored medicine cabinets. Modern variations sit flush with the drywall, offering hidden, substantial shelving without protruding over the sink. Additionally, installing floating shelves high up on walls—such as above the toilet or just below the ceiling—provides excellent homes for extra towels and supplies, successfully utilizing ignored vertical real estate.
6. Brighten the Room with Layered Lighting and Oversized Mirrors
Poor lighting will make even the most beautifully designed room feel like a dungeon. Relying strictly on a single overhead dome light casts harsh shadows, emphasizing tight corners. The secret lies in a layered lighting scheme: combining ambient (overhead), task (vanity sconces), and accent (under-cabinet LED strips) lighting to wash the room evenly.
Pairing a strong lighting plan with an oversized mirror works wonders. Mirrors reflect both light and the opposing walls, effectively doubling the perceived depth of the room. Install a wide, backlit mirror that spans the entire width of your vanity station to drastically amplify the available light and create a modern, luxurious aesthetic.
")
7. Scale Down Fixtures and Add Space-Saving Pocket or Barn Doors
Every inch counts, including the space required simply to enter the room. Standard inward-swinging doors require up to 9 square feet of clearance to open and close, rendering the wall space behind them completely unusable. By retrofitting your entryway with a pocket door that slides cleanly into the wall cavity, or a sliding barn door on an exterior track, you instantly reclaim that lost area for towel bars or storage.
Furthermore, ensure you are scaling your fixtures appropriately. A massive double vanity has no place in a 40-square-foot footprint. Opt for shallow-depth vanities, narrow-profile sinks, and compact elongated toilets. These scaled-down fixtures provide full functionality without suffocating the room’s central walking path.
Tackling Seattle’s Damp Climate: Ventilation and Mold-Resistant Materials
Designing for the Pacific Northwest requires acknowledging our unique environmental challenges. The Greater Seattle area experiences high ambient humidity for most of the year. When you combine our wet climate with a tightly sealed, steamy bathroom, you create the perfect breeding ground for mold and mildew. Proper ventilation is not just a luxury; it is a structural necessity.
When remodeling, prioritize the installation of a high-CFM (Cubic Feet per Minute), low-sone exhaust fan equipped with a humidity-sensing switch. This ensures moisture is automatically extracted during and after showers. Furthermore, specify advanced building materials: use mold-resistant drywall (green board or purple board) behind all painted surfaces, waterproof membrane systems (like Schluter-Kerdi) in the shower surround, and epoxy-based grouts that naturally repel water and stains. For a deeper dive into regional material selection, read our guide on How to Design a Mold-Resistant Bathroom in Washington’s Damp Climate.
Budgeting for a Compact Bathroom Renovation in the Greater Seattle Area
Understanding regional costs is critical before tearing out your old tiles. Because plumbing, electrical, and waterproofing labor rates in King County are higher than the national average, even a space-conscious renovation requires a realistic financial plan. Below is a general breakdown of what homeowners in Renton, Bellevue, and Tukwila can expect to invest in 2026.
| Remodel Tier | Estimated Price Range (Seattle Metro) | Typical Scope of Work |
|---|---|---|
| Basic / Refresh | $12,000 – $18,000 | Keeping existing layout. Cosmetic updates: new vanity, fresh paint, upgraded fixtures, luxury vinyl plank flooring, reglazing existing tub. |
| Mid-Range / Pull-and-Replace | $20,000 – $32,000 | Keeping existing layout. Full gut to studs. Tub-to-shower conversion, large-format tile surround, frameless glass enclosure, layered lighting, new exhaust system. |
| Upscale / Custom Layout | $35,000 – $50,000+ | Moving plumbing stacks. Curbless walk-in shower, wall-mounted toilet, custom cabinetry, heated flooring, premium tile, advanced electrical upgrades. |
It may seem counterintuitive, but a small bathroom can cost as much as a larger one. Remodeling is priced by complexity, not just square footage — relocating plumbing, packing premium finishes into a full gut, and adding heated floors or custom cabinetry drive the budget far more than the room’s size. Keep in mind that altering the fundamental plumbing footprint (moving the toilet or main drain lines) will significantly increase the final bill. For a more detailed, line-item analysis of local pricing, explore our comprehensive breakdown: What is the Average Cost of a Bathroom Remodel in Renton?.
")
Frequently Asked Questions About Maximizing a Small Bathroom
When preparing for a comprehensive home improvement project, homeowners naturally have questions about logistics, aesthetics, and costs. Here are straightforward answers to the most common queries regarding tight-space bathroom renovations.
How can I make a small bathroom look bigger?
You can make the room look bigger by maximizing natural light, utilizing large-format tiles with minimal grout lines, painting the walls and ceiling in continuous light, reflective colors, and incorporating oversized mirrors. Additionally, installing a floating vanity and a clear glass shower enclosure removes visual roadblocks, tricking the eye into perceiving a much larger floor plan.
What is the best layout for a small bathroom?
The optimal layout typically aligns all the plumbing fixtures (sink, toilet, and shower) along a single “wet wall.” This single-wall layout reduces plumbing labor costs and keeps the opposite wall entirely free for movement and door swings. Placing a curbless walk-in shower at the far end of the room is the most efficient use of rectangular residential spaces.
Is a walk-in shower good for a small bathroom?
Yes, absolutely. A walk-in shower is arguably the best choice for a restricted footprint. By removing the bulky frame of a traditional bathtub, you regain critical square footage. Paired with a frameless glass door and a continuous floor tile design, a walk-in shower dramatically enhances both the spatial flow and the modernized aesthetic of the room.
Where do I start with small bathroom remodel ideas for my specific layout?
Begin by measuring your exact square footage and identifying the fixed elements that cannot be easily moved, such as exterior windows and main plumbing stacks. Once you know your constraints, curate small bathroom remodel ideas that focus on high-impact upgrades: upgrading lighting, improving ventilation, and selecting scaled-down fixtures that fit the exact proportions of your room without overcrowding the walkways.
How much does a small bathroom renovation cost in Seattle?
In 2026, a mid-range, pull-and-replace renovation in the Greater Seattle area typically ranges from $20,000 to $35,000. This includes fully gutting the room, installing a new tile shower with glass doors, upgrading the vanity and toilet, and addressing local moisture control with high-quality exhaust ventilation. High-end custom projects involving plumbing relocation will push the budget closer to $45,000–$50,000.
Ready to Transform Your Cramped Eastside Bathroom? Schedule a Free In-Home Estimate
Living with a dark, boxed-in 1970s room can be a daily frustration, but it doesn’t have to be permanent. By utilizing smart spatial design, modern lighting techniques, and the right combination of high-performance fixtures, even the most restrictive layouts in Renton, Bellevue, and Maple Valley can be transformed into luxurious, breathable spaces. Navigating these upgrades requires an experienced touch, especially when balancing aesthetic desires with the rigorous demands of Pacific Northwest plumbing and waterproofing standards.